Some notes on how to setup the project (for development purposes)
Install dependencies
The most up-to-date setup uses the uv package manger, but conda should work
file as well. Unfortunately the bpy package (used for generating houses) is no
longer available in PyPi for the Python version that we currently target (3.10),
so we have to manually install it as first step, like this:
# If using conda as package manager, just use plain `pip`
pip install bpy==3.6.0 --extra-index-url https://download.blender.org/pypi/
# If using uv as package manager, use `uv pip` instead
uv pip install bpy==3.6.0 --extra-index-url https://download.blender.org/pypi/
After this, we can install all other dependencies along with the molmo_spaces
package using the provided pyproject.toml, like this:
# If using conda as package manager, just use plain `pip`
pip install -e .
# If using uv as package manager, use `uv pip` instead
uv pip install -e .
Note: For development purposes, you can install the extra dev packages:
# If using conda as package manager, just use plain `pip`
pip install -e . --group dev
# If using uv as package manager, use `uv pip` instead
uv pip install -e . --group dev
Configure development setup
After you have installed the dependencies in the dev group, we have to setup
pre-commit and the related hooks so these can run when doing a commit to the
repository. Just run the following to install the hooks:
After this, you can run pre-commit run on your local changes that are staged,
it should show something like this:
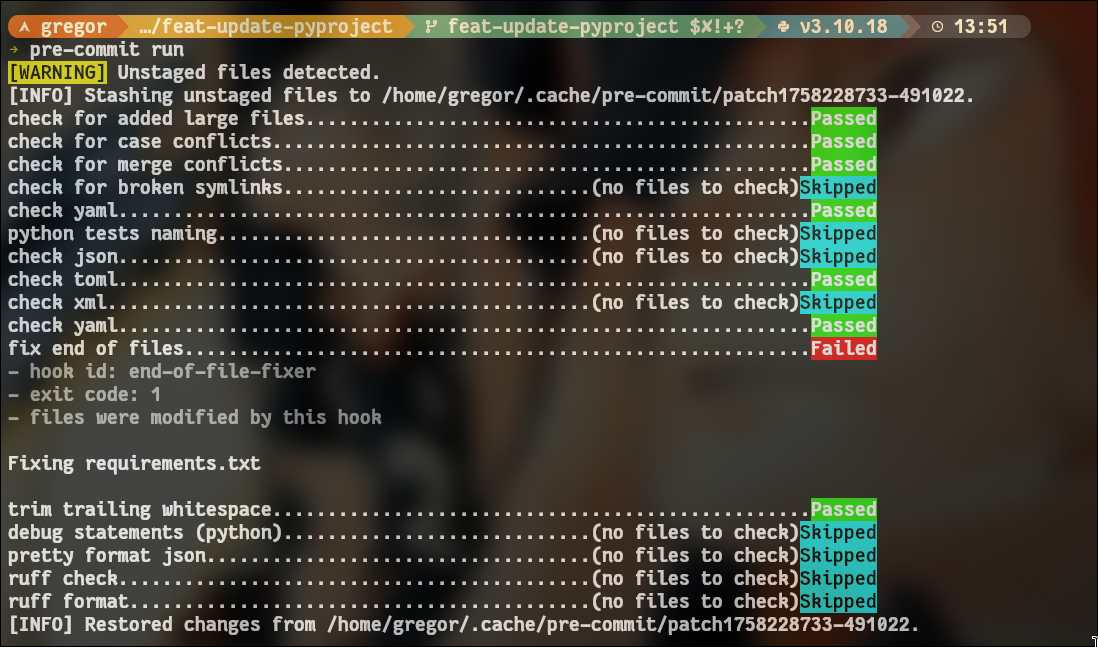
In this case the hooks catched an issue with the line ending of the requirements.txt
file, it complains that files should have an empty line at the end (we could disable
this hook if it's too annoying :sweat_smile:). Note that no Python files were
staged, so the hooks for ruff and mypy didn't run. For more info on how
to use pre-commit check this video, and the docs.
Note: In very extreme cases, you might need to skip running the hooks, for
example, if the checks are not configured correctly and running on all files (for
now it should only run on staged files only). To skip the checks, just run your
commit with the --no-verify flag. Just keep in mind that the CI/CD pipeline
will catch these issues in the future once enabled, currently it's using black
to check only for formatting, but in the next PR will change this to use ruff
for formating and linting, and mypy for type checking.
Updating the linting rules
If you want to enable/disable a linting rule for ruff, you can do so by modifying
the corresponding section on the pyproject.toml file. For example, to enable a whole
set of linting checks, you could change this section:
[tool.ruff.lint]
select = [
    # docstring
    "D",
    # pycodestyle
    "E",
    # Pyflakes
    "F",
    # pyupgrade
    "UP",
    # flake8-bugbear
    "B",
    # flake8-simplify
    "SIM",
    # isort
    "I",
    # PEP8
    "W",
    # flake8-annotations
    "ANN",
]
The rules identifiers can be found here, so you can add extra rules if you
want :smiley:. To disable specific linting checks from ruff, you can add the
corresponding rule id to the ignore list in the same section of the pyproject.toml
file, like this (add to the ignore list of rule ids):
[tool.ruff.lint]
select = [
    # ...
]
ignore = [
    "C408", # don't complain about usage of dict() calls
    "C901", # don't complain about function complexity
    "E501", # don't complain about line-length (handled by line-length setting)
    "B006", # defaults shouldn't be mutable
    "UP015", # redundant mode arguments in open should be fine for now
    "SIM117", # allow nested with statements for now
    "SIM102", # don't be picky about nested if statements
    "SIM114", # don't be picky about merging if branches using or
]
You can get the id of the rule you want to disable by checking on the warning
given by your IDE. If you're using vscode, just hover over the warning message
and you can grab the rule ID for that lint check.
Setting up IDE (e.g. vscode)
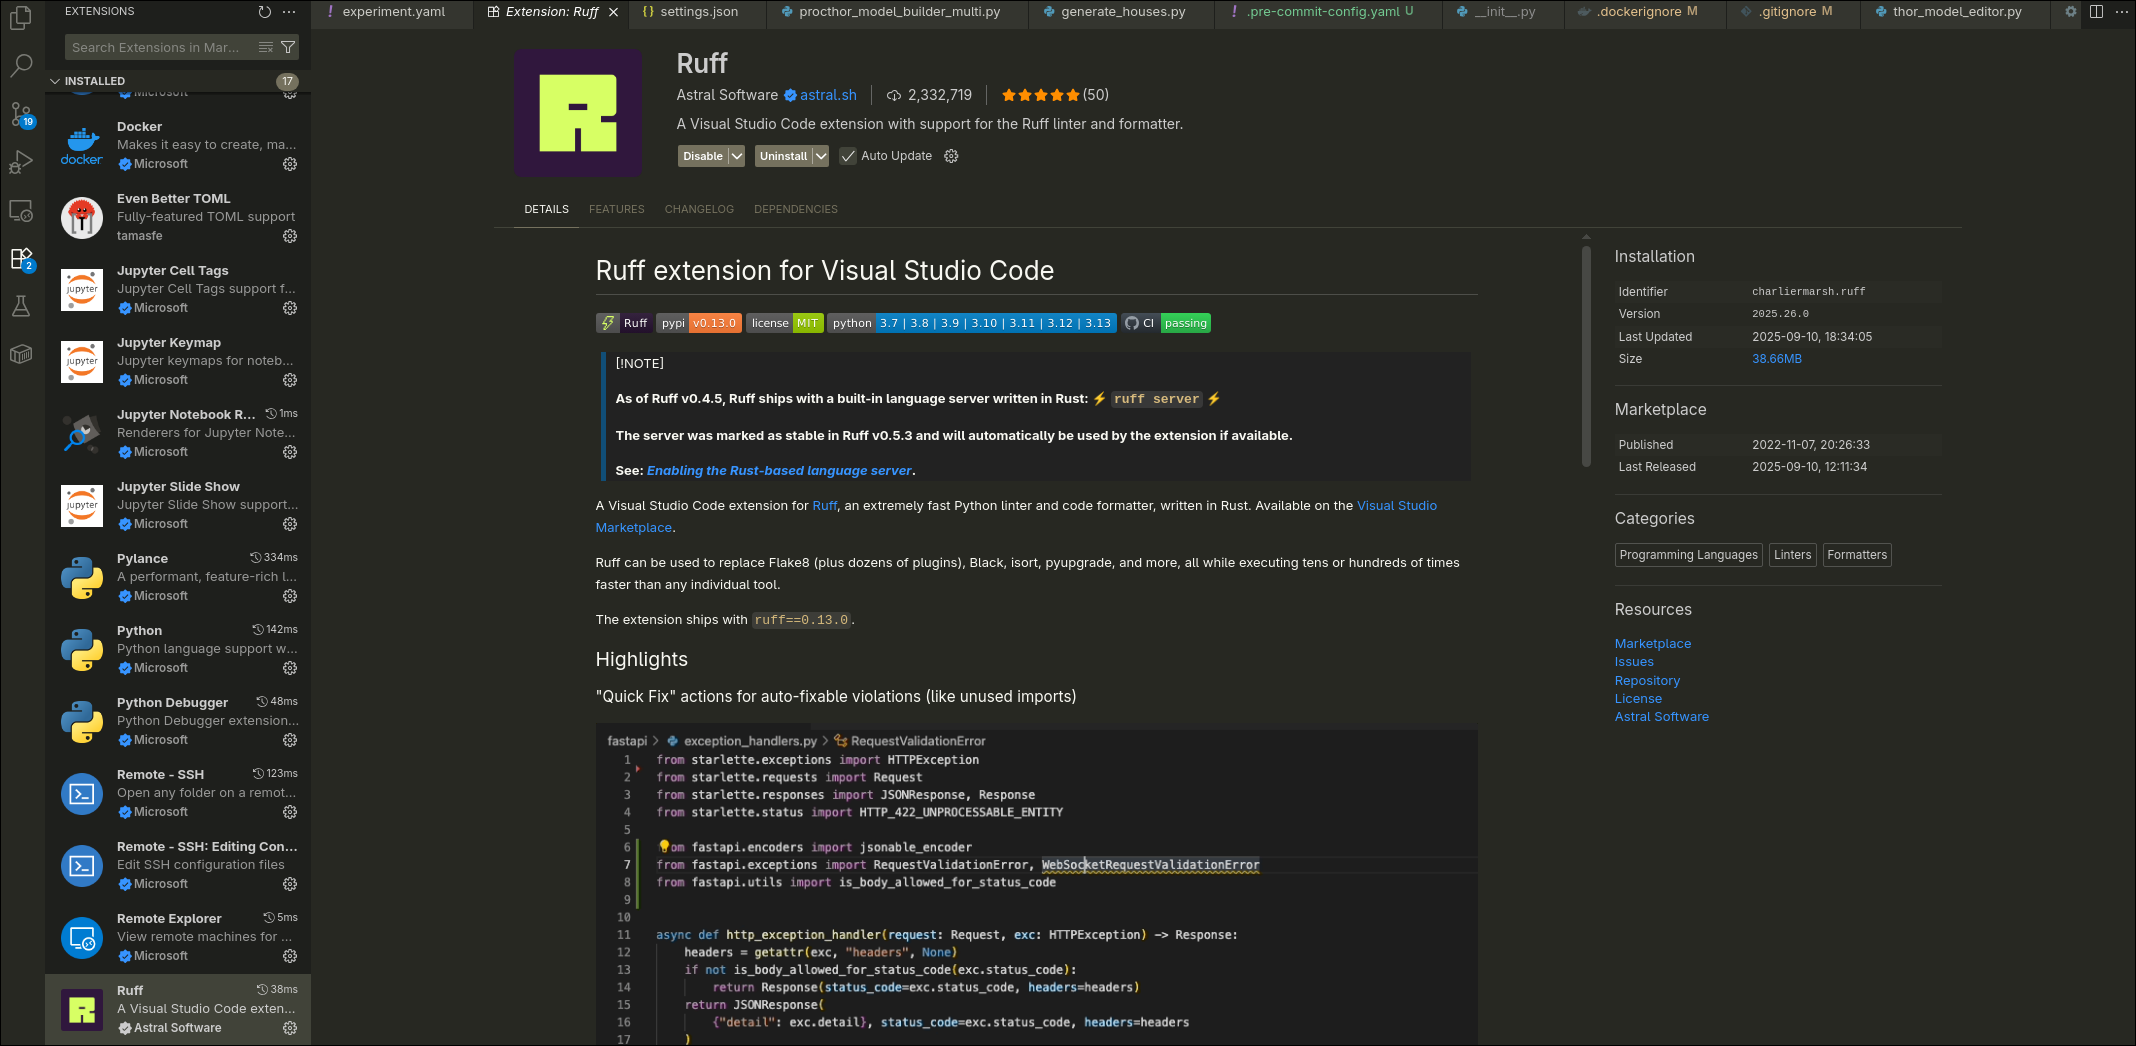
For formatting and linting you might want to install the ruff vscode extension:
To set it up, just add this to your user settings (change formatOnSave to your
desired setting):